Information Centre
Customer service
Here to Help
About Us
Useful Links
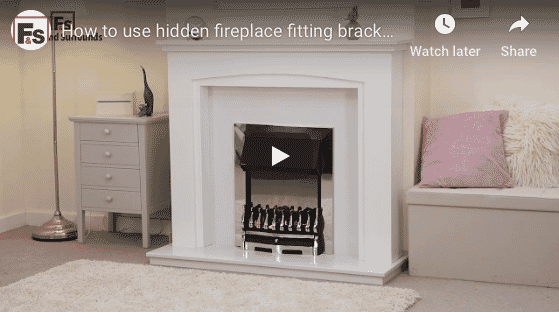
Fire Surround Fitting Video Guide
Using our wood fireplace brackets gives a great finish to your wood fire surround and fitting them couldn't be easier.
Click below to watch a step by step guide.
If you already have a fire surround and would like to purchase some fitting brackets CLICK HERE
To go back to all our fireplace tips and tricks CLICK HERE.
It may seem complicated but fitting one of our surrounds couldn't be easier.
This simple guide assumes that you already have your hearth and back panel in position. If not then you can read our article on fitting these.
1. The first step is to decide on where you want your fire surround to sit on the wall. Generally, this will be central on your chimney breast or central to the room.
2. Position the fire surround in the approximate position you want it and measure from the edge of the chimney breast to the fire surround until both sides are equal.
3. Once you have got the fire surround in the perfect position, very carefully pull one side away from the wall a couple of inches. With a pencil mark the wall just inside the edge of the surround, make sure the mark you make will be covered by the fire surround when you put the fire surround back in place. Do this on both sides.
4. Carefully move the fire surround away from the wall
5. Using a ruler measure 30mm (this is in from the outside of the leg, towards the centre of the surround). This mark is where the edge of your bracket (B) is going to be fixed.
Fitting the Brackets to the Wall.
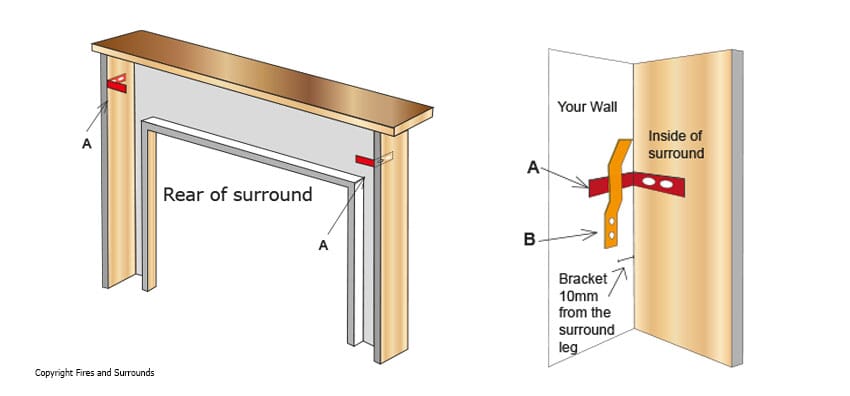
The brackets are designed to stop the surround falling forwards; you do not have to worry about getting everything level.
1. In the pack you will find two right angle brackets (A), 2 bent brackets (B) and four wood screws.
2. You now need to position the bracket (B) halfway between the shelf and the hole opening and mark where the screws need to go on the wall. The height of this bracket isn't critical, but we would suggest getting the bracket as high as possible.
3. If you have a stone wall, drill into the wall and using raw plugs fasten the bracket (B) to the wall. As every installation and requirement is different, we do not supply screws or raw plugs to do this with.
4. If you have a plasterboard wall, then you need to tap the wall until you find a wooden batton. As I mentioned earlier, it is not essential that the brackets are fitted in any specific location but try and find a batton as high as possible.
Note
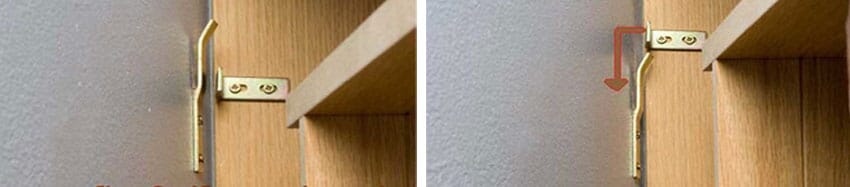
If you can not find a wooden batton to screw into around the top of the legs, then it is possible to screw the bracket (A) into the inside of the shelf top and rotate the bracket (B) horizontally.
Fitting the Brackets to the surround.
1. Now that you have the bracket (B) fastened to the wall take the other bracket (A) and slide it by hand down behind bracket B.
2. With the bracket held in position measure from the hearth to the middle of the screw holes on bracket A.
3. Now go back to your fire surround and turn it around, so the back is facing you. Measure up the inside back of the leg by the same amount and mark the surround. Using a straight edge draw a horizontal line at this point, we are doing this so that when you position bracket A you will see this line through the screw holes, making positioning easier.
3. With the flat edge of the bracket level with the back of the surround fit the bracket to the inside of the legs. The screw holes in the brackets are elongated to allow you to move the bracket once fitted. So aim to position your screws into the centre of these elongated holes.
4. Once both brackets are fitted lift the surround up and on to the wall brackets. If more tension is required, remove the surround and loosen the brackets (A) and move them back slightly, then rehang the surround.
CLICK HERE If you are not purchasing a fire surround but would like to purchase a fitting kit from us.